Topsellers
 Pull-up Bars
 Training Equipment
 Resistance Bands
 Push-up Bars/Parallettes
 Other Equipment
 Sling Trainer
 Bundles
 Deals & B-Stock (%)
 Guides
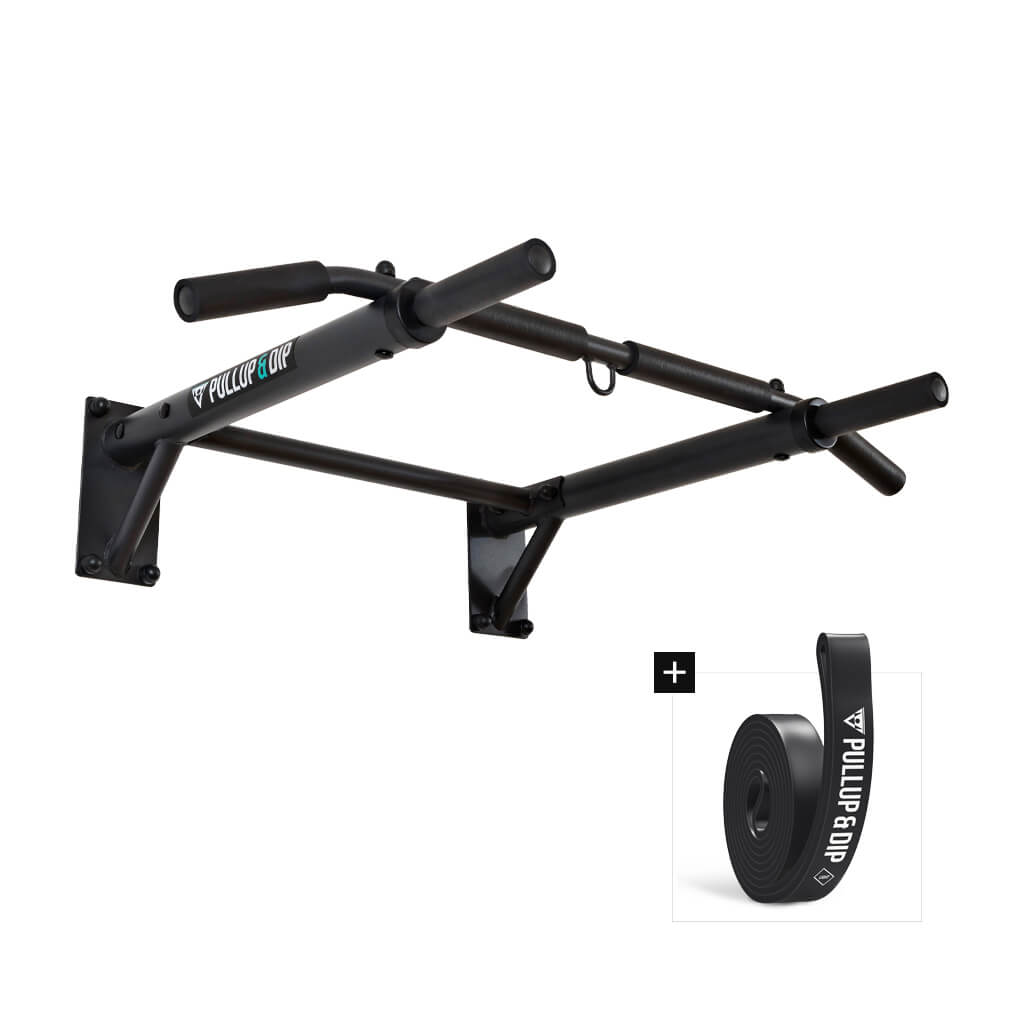
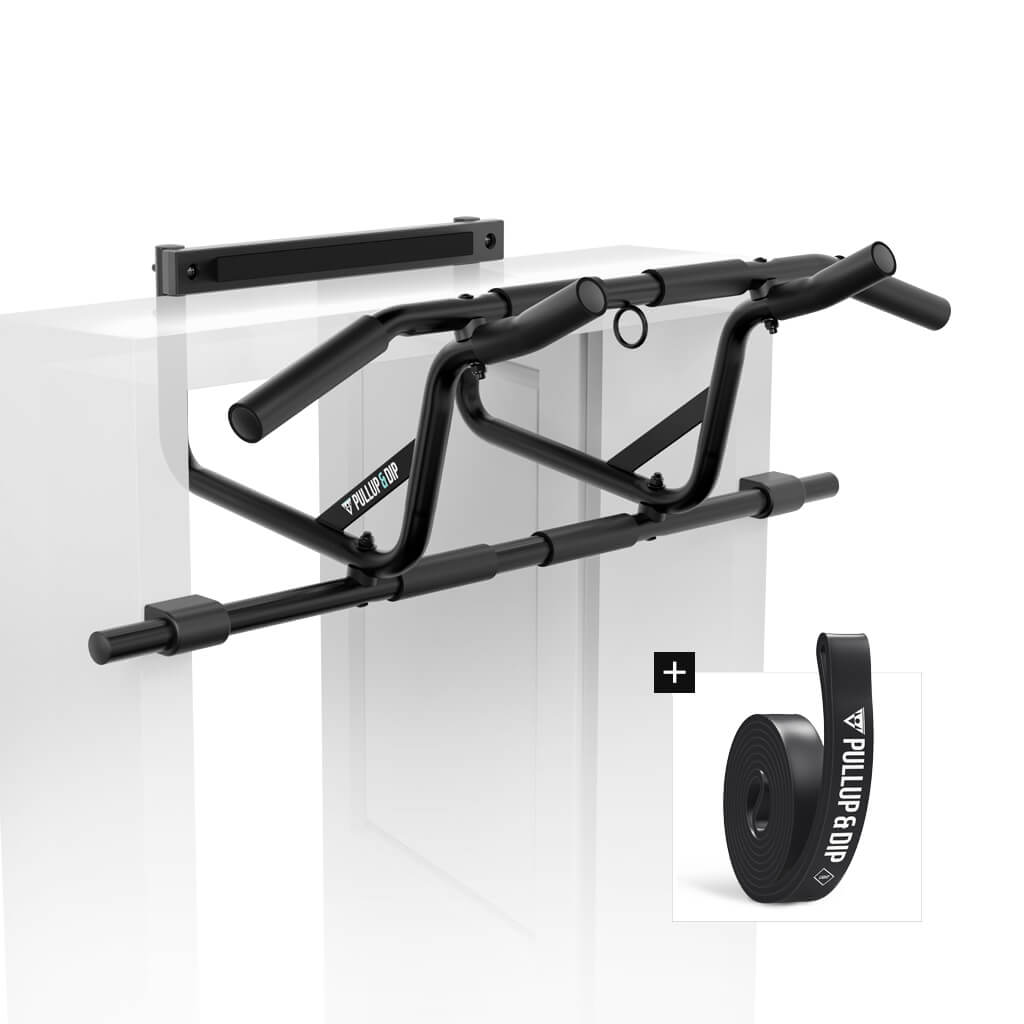
The mobile pull-up and dip bar of Pullup & Dip can be mounted both outdoors on a tree or post, as well as at home on a wall (indoor and outdoor wall). Since the assembly can be shown very well with videos, you will find below two detailed assembly videos of the Pullup & Dip bar. In addition, you will find as well as in the included instruction manual the assembly steps for indoor and outdoor pull-up bar assembly in step-by-step text form.
If you still have questions about the assembly, take a look at our FAQ's or contact us by e-mail. Furthermore, we also show you the assembly of our door pull-up bar, door bar pull -up bar and wall pull-up bar.
Outdoor Pull-up bar installation of Pullup & Dip bar
- 01Depending on the diameter of the tree or pole, the two angles on the backside of the outdoor adapter can be adjusted. To do so, unloose the four knurled nuts on the front side and adjust the angles accordingly to the desired width.
- 02Determine your optimum height of the outdoor adapter and fasten the protection mat with the provided velcro fastener (slender) around the tree or the pole.
- 03Fasten afterwards the outdoor adapter to the protection mat with the velcro fastener (wide) to have thus both hands available.
- 04Lead the end of the tension belt through the two eyelets of the outdoor adapter, put the end of the belt through the admission of the tension belt and pull through the belt as far as possible by hand. Make sure that the belt is not twisted.
- 05Now tighten the tension belt as firmly as possible with the lever. Pay attention that the tension adjuster is completely closed at the end.
- 06Now you can insert the side arm into the outdoor adapter, twist the blocking pin hence it snaps into the outdoor adapter for safety reasons and insert both bars into the side arm. Afterwards insert both bolts through the drillings so they can be seen from the backside.
Pull Up bar installation of Pullup & Dip bar on a brick or concrete wall
Required material:
- Drilling template Pullup & Dip + tapes to fix it to the wall
- Indoor adapter
- Water level
- Percussion drilling machine
- Hammer
- 2 x driller (pre drill with 5 mm and 10 mm of diameter)
- Folding ruler
- 1 x spanner 13 mm
- 7 x fischer long shaft dowel
- Staubsauger
Wall mounted pull-up bar installation:
- 01The distance from top edge of the indoor adapter (see drilling template) to ceiling should be at least 45 cm. Level the drilling template very precisely with a water level and fix it with tape to the wall. Depending on your body size decide the final height by yourself.
- 02After fixing the drilling template to the wall, predrill all seven holes with the 5 mm driller. After that, drill all seven holes with the 10 mm driller to final diameter. The drilling depth should be at least 110 mm. After that take away the drilling template from the wall and use a vacuum or a blowout to get the drilling dust out of the holes.
-
03Press
the
indoor
adapter
over
the
eight
holes,
use
the
hammer
to
knock
the
dowels
carefully
into
the
wall
and
use
the
wrench
to
turn
the
screws
into
the
wall.
Please note: For concrete or reinforced concrete walls after drilling with the 10 mm drill, drill the holes additionally with 2-3 in and out movements so that the dowel has sufficient space.
Our user manual. Download.
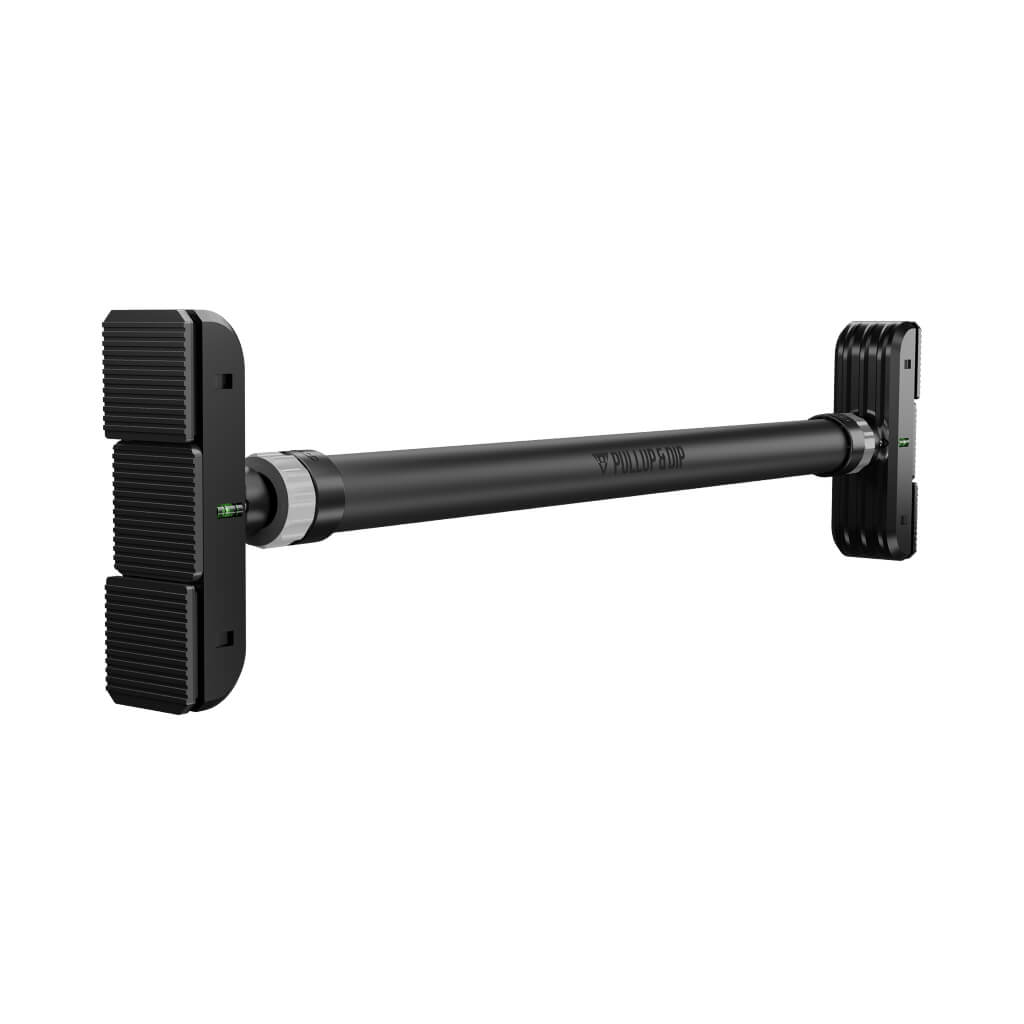
Door pull up bar assembly
Telescopic pull-up bar assembly
Wall mounted pull-up bar installation:
Drilling machineconcrete wall: Makita hammer drill
Drilling machinepure brick wall: Bosch percussion drill
spirit level: Connex spirit level
Open-end wrench: Mannesmann open-end wrench
Drill bits (5.0 and 10.0 mm): Concrete drill bit set
Hammer: Metalworker's hammer
Meter rule: Wooden rule
(the products above are only for recommendation, of course other products are also suitable for pull-up bars wall mounting).
Discover our pull-up bars
-0%
-0%
-0%

-0%